Laying Asphalt Shingles
Laying asphalt shingles, a seemingly straightforward task, reveals itself as a nuanced process demanding precision and attention to detail. From selecting the right shingles for your climate and roof style to mastering the art of proper nailing and overlapping, each step contributes to the longevity and structural integrity of your roof. This guide delves into the intricacies of asphalt shingle installation, providing a step-by-step approach for both novice and experienced DIYers, ensuring a successful and safe project. We will explore the various shingle types, necessary tools, safety precautions, and advanced techniques for handling complex roof features, ultimately empowering you to confidently tackle this essential home improvement project.
Understanding Asphalt Shingle Laying
Installing asphalt shingles is a crucial aspect of roofing, demanding precision and attention to detail for a durable and weather-resistant roof. This section details the various shingle types, necessary tools and materials, and the crucial preparatory steps for a successful installation.
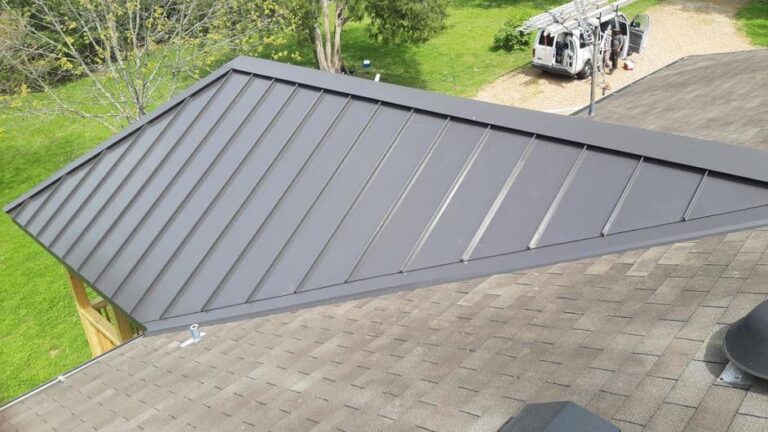
Asphalt Shingle Types
The market offers a variety of asphalt shingles, each with unique properties and aesthetics. Three common types include:
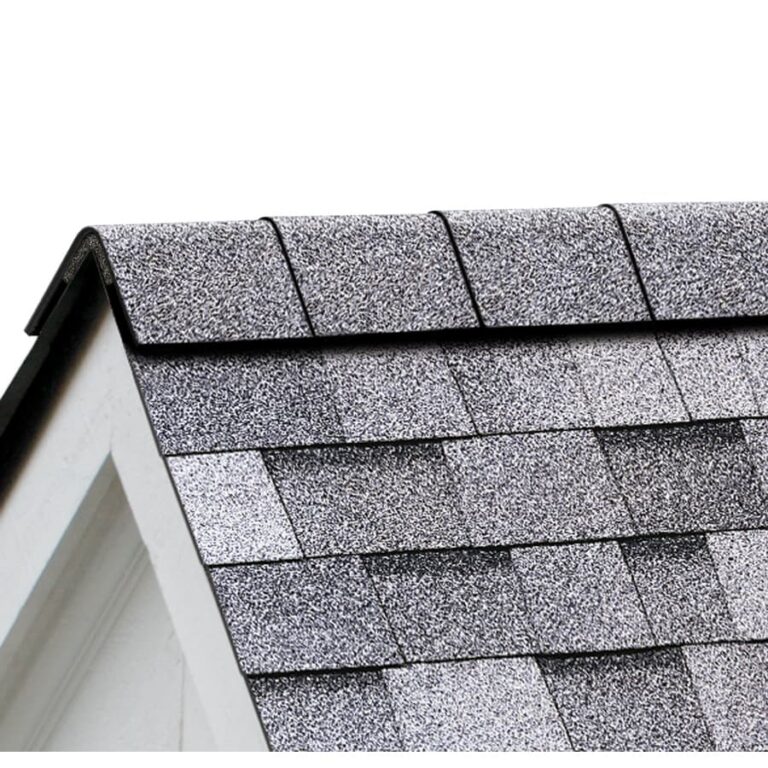
- 3-Tab Shingles: These are the most economical and widely used, characterized by their three-tab design and relatively simple installation.
- Architectural Shingles: Also known as dimensional shingles, these offer a thicker profile and more textured appearance, enhancing the roof’s aesthetic appeal and often providing superior durability.
- Luxury Shingles: These high-end options often mimic the look of natural materials like slate or wood, boasting enhanced durability, weather resistance, and a premium aesthetic.
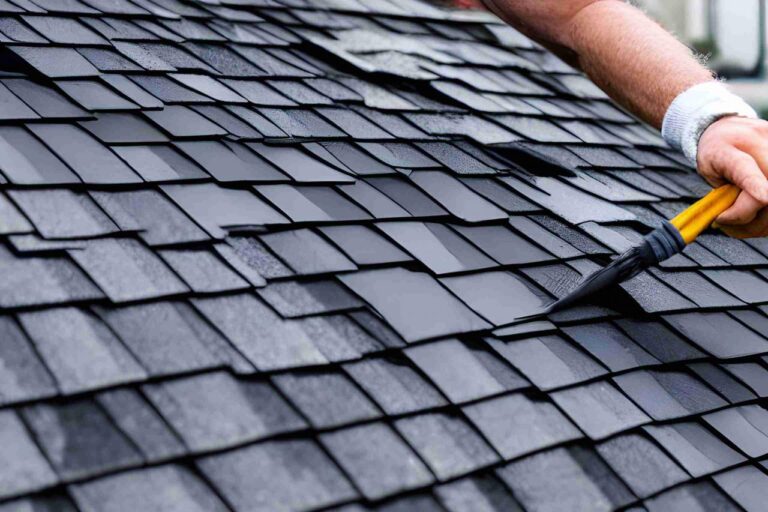
Tools and Materials for Asphalt Shingle Installation, Laying asphalt shingles

Source: modernize.com
A successful installation requires the right tools and materials. Essential items include:
- Asphalt shingles (quantity based on roof area)
- Roofing nails
- Hammer or pneumatic nail gun
- Utility knife or shingle cutter
- Chalk line
- Measuring tape
- Roofing felt or underlayment
- Safety harness and rope
- Ladder
- Work gloves
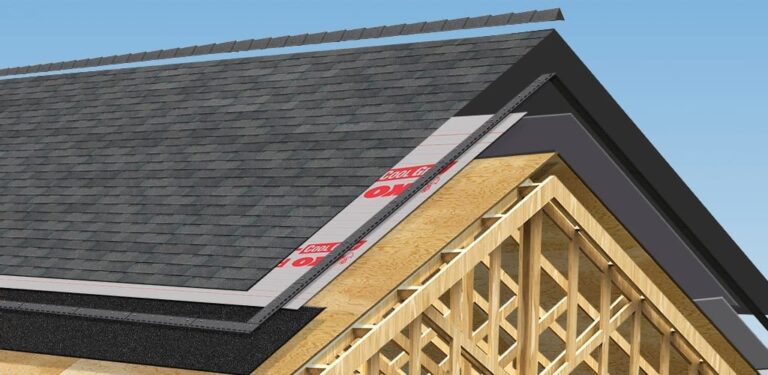
Roof Deck Preparation
Proper roof deck preparation is paramount for a long-lasting shingle installation. This involves several critical steps:
| Step | Tools/Materials | Safety Precautions | Description |
|---|---|---|---|
| Inspect and repair the roof deck | Hammer, nails, wood patches | Wear a safety harness and gloves | Identify and repair any damaged areas, ensuring a smooth, even surface. |
| Clean the roof deck | Broom, leaf blower | Secure footing, use caution on slopes | Remove debris, dirt, and loose materials to ensure proper adhesion. |
| Install roofing felt or underlayment | Staple gun, staples | Maintain balance and secure footing | This waterproof layer protects the roof deck and provides an additional barrier against moisture. |
| Check for proper ventilation | Inspection of existing vents | Avoid damaging existing ventilation | Ensure adequate ventilation to prevent moisture buildup and extend the life of the shingles. |
The Shingle Laying Process: Laying Asphalt Shingles
The actual shingle installation process requires precision and adherence to best practices to ensure a long-lasting and leak-proof roof. This section details crucial aspects like starting a shingle row, ensuring proper overlap, and avoiding common mistakes.
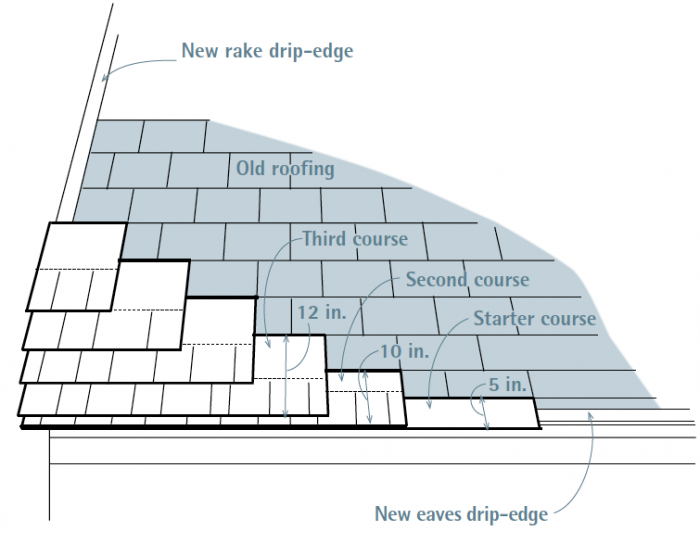
Starting a Shingle Row
Beginning the first row correctly is crucial for the entire roof’s alignment. Start at the lowest point of the roof, ensuring the first row is perfectly level and aligned using a chalk line. Each shingle should be securely nailed, using the manufacturer’s recommended nailing pattern for optimal hold.
Shingle Overlap
Proper shingle overlap is essential for preventing water penetration. Manufacturers specify the exact overlap; adhering to this is critical. Insufficient overlap leaves gaps, potentially leading to leaks, while excessive overlap can create unsightly bulges and affect the roof’s aesthetics.
Common Mistakes to Avoid
Several common mistakes can compromise the roof’s integrity. Avoiding these issues is crucial for a successful installation.
- Improper nailing: Using too few nails or nailing incorrectly can lead to shingle blow-off in high winds.
- Uneven shingle alignment: Inconsistent alignment creates gaps and compromises the roof’s water resistance.
- Neglecting ventilation: Inadequate ventilation can trap moisture, leading to premature shingle deterioration.
- Ignoring damaged shingles: Using damaged shingles compromises the entire roof’s integrity.
Advanced Techniques and Considerations

Source: hswstatic.com
Installing shingles around complex roof features and managing varying weather conditions require specialized techniques and careful planning. This section will discuss these challenges and provide solutions.
Installing Shingles Around Complex Roof Features
Chimneys, valleys, and other complex features require careful shingle placement and trimming to ensure a watertight seal. Different techniques are used depending on the specific feature.
| Roof Feature | Technique | Materials | Safety Precautions |
|---|---|---|---|
| Chimney | Step flashing and counter flashing are installed to create a watertight seal around the chimney. Shingles are carefully cut and fitted around the flashing. | Step flashing, counter flashing, roofing cement | Secure footing, use a safety harness |
| Valley | Valley flashing is installed to direct water away from the valley. Shingles are carefully cut and overlapped to ensure proper coverage. | Valley flashing, roofing cement | Secure footing, use a safety harness |
| Ridge | Ridge cap shingles are installed to cover the ridge and protect it from the elements. | Ridge cap shingles, roofing cement | Secure footing, use a safety harness |
Weather Conditions
Source: amazonaws.com
Extreme heat can cause asphalt shingles to become soft and difficult to work with, while rain or snow can hinder installation and compromise adhesion. Optimal conditions are generally dry and moderate temperatures.
Cutting and Trimming Shingles
Precise cutting is necessary for a neat and watertight finish around vents, chimneys, and other roof features. A sharp utility knife or shingle cutter should be used. The shingle should be scored along the cut line before snapping or cutting to prevent chipping. For curved areas, multiple small cuts may be necessary to achieve a smooth fit.
Safety and Regulations
Safety is paramount during asphalt shingle installation. Adhering to safety protocols and relevant building codes is essential for a safe and compliant project. This section Establishes necessary safety measures and regulations.
Safety Checklist
A comprehensive safety checklist is crucial to minimize risks. This includes:
- Wearing a safety harness and using fall protection equipment.
- Using appropriate safety footwear.
- Wearing safety glasses and gloves.
- Use caution when working at heights.
- Ensuring proper ladder setup and usage.
- Being aware of overhead power lines.
Building Codes and Regulations
Local building codes and regulations dictate specific requirements for asphalt shingle installation, including shingle type, nailing patterns, and ventilation. It is crucial to consult these regulations before beginning the project.
Potential Hazards and Safety Precautions

Source: com.au
| Hazard | Safety Precautions |
|---|---|
| Falls from height | Use a safety harness and fall protection system. |
| Cuts from sharp objects | Wear gloves and use caution when handling sharp tools. |
| Exposure to the elements | Use appropriate clothing and sunscreen. |
| Electrocution | Be aware of overhead power lines. |
Post-Installation Procedures
Post-installation procedures are critical for ensuring the longevity and performance of the new roof. This involves thorough inspections, proper cleanup, and responsible waste disposal.
Post-Installation Roof Inspections
A comprehensive inspection should be performed after the installation is complete to identify any defects or areas requiring attention. This should include checking for proper shingle alignment, nailing, and overall roof integrity.
Cleanup Procedures
After the installation, thorough cleanup is essential. This involves removing all debris, including discarded shingles, nails, and other waste materials, from the roof and surrounding areas. This prevents accidents and maintains a clean worksite.
Waste Disposal
Proper disposal of waste materials is crucial for environmental protection. Discarded shingles and other roofing materials should be disposed of according to local regulations. Recycling options should be explored whenever possible.
Query Resolution
What is the average lifespan of asphalt shingles?
The lifespan of asphalt shingles varies depending on the quality, climate, and installation. Generally, they last between 15 and 30 years.
Can I install asphalt shingles in cold weather?
Installing asphalt shingles in cold weather can be challenging. The shingles may become brittle and more prone to cracking. It’s generally recommended to install them when temperatures are above freezing.
How much does it cost to install asphalt shingles?
The cost varies significantly based on factors such as roof size, shingle type, labor costs, and location. It’s best to obtain multiple quotes from reputable contractors.
What type of underlayment is best for asphalt shingles?
Several underlayment types exist, including felt paper and synthetic underlayments. Synthetic underlayments offer superior water resistance and durability but are generally more expensive.
How do I dispose of old asphalt shingles responsibly?
Check with your local waste management authority for proper disposal methods. Many areas have specific guidelines for handling roofing materials.